I’ve used a lot of audio engineering terms over the years and realized that a lot of them were not exactly what I was referring to/meant. While talking to a lot of experienced audio engineers, I’ve always found the below glossary useful to convey my objectives effectively. Hopefully this serves as starter boilerplate for more research with more terms to be added on. A lot of these and more are covered in Coursera’s excellent course on the Technology of Music Production.
Nature of sound
Amplitude: Size of the vibration of sound. Larger sizes (louder sound) indicate louder amplitude. Measured in decibels. Multiple places in the signal flow where we measure amplitude.
- In the air: dBSPL or decibels of sound pressure level
- In the digital domain: dBFS or decibels full scale
Compression: Compression is one of the most commonly used type of dynamic processing. It is used to control uneven dynamics in individual tracks in a multi track mix and also to be used in creative ways like decays of notes and for fatter sounds. Compressors provide gain reduction which is measured by metrics like Ratio control.
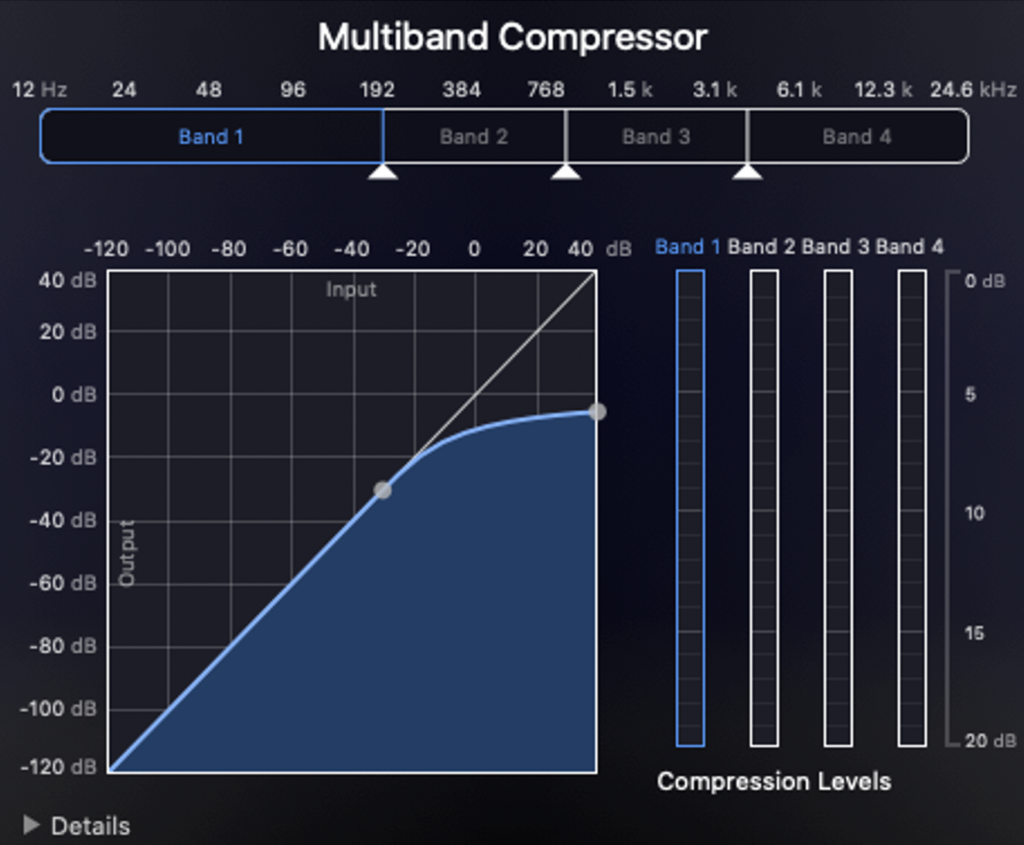
- For example a ratio like 4:1 , means audio that goes above 4 dB above Threshold will be reduced to it only goes 1 dB above only.
Decibel: The words bel and decibel are units of measurement of sound intensity. Bel” is a shortening of the name of inventor Alexander Graham Bell (1847-1922).
- A bel is equivalent to ten decibels and used to compare two levels of power in an electrical circuit.
- The normal speaking range of the human voice is about 20-50 decibels.
- Noise becomes painful at 120 db. Sounds above 132 db lead to permanent hearing damage and eardrum rupture.

Frequency: Speed of the vibration which determines the pitch of the sound. Measured as the number of wave cycles that occur in one second.
Propagation: Sequence of waves of pressure (sound) moving through a medium such as water, solids or air.
Timbre: Term used to indicate distinguished characteristics of a sound. For example a falsetto versus a vibrato.
Transducer: Another term for a microphone. Converts one energy type to another. A microphone converts sound pressure variations in the air into voltage variations in a wire.
Digital Audio Workstation (DAW)
Bit Rate: Product of sampling rate and sampling depth and measured as bits per second. Higher bit rates indicates more quality. Compressed audio formats (mp3) have lower bit rates than uncompressed (wave).
Buffer Size: Amount of time allocated to the DAW for processing audio.Used to balance the delay between the audio input ( say a guitar plugged in ) to the sound playback and to minimize any delay. It usually works best to set the buffer size to a lower amount to reduce the amount of latency for more accurate monitoring. However, this puts more load on the computer’s processing power and could cause crashes or interruptions.

Sampling Rate: Rate at which samples of an analog signal are taken to be converted to a digital form Expressed in samples per second (hertz). Higher sampling rates indicate better sound as they indicate higher samples per second. An analogy could be FPS i.e Frames per second in video. Some of the values we comes across are 8kHz, 44.1kHz, and 48kHz. 44.1 kHz are most common sampling rates for audio CDs.
Sampling Depth: Measured in bits per sample indicates the number of data points of audio. An 8-bit sample depth indicates a 2^8 = 256 distinct amplitudes for each audio sample. Higher the sample depth, better the quality. This is analogous to image processing where higher number of bits indicate higher quality.
Sine wave: Curve representing periodic oscillations of constant amplitude. Considered the most fundamental of sound. A sine wave can be easily recognized by the ear. Since sine waves consist of a single frequency, it’s used to depict/test audio.
In 1822, French mathematician Joseph Fourier discovered that sinusoidal waves can be used as simple building blocks to describe and approximate any periodic waveform, including square waves. Fourier used it as an analytical tool in the study of waves and heat flow. It is frequently used in signal processing and the statistical analysis of time series.
- Wave: Uncompressed at chosen bit rate and sampling speed. Takes up memory and space.
- AIFF: Audio Interchange File Format (AIFF): Uncompressed file format (originally from Apple). High level of device compatibility and used in situations for mastering files for audio captured live digitally.
- MP3: Compressed Audio layer of the larger MPEG video file format.Smaller sizes and poorer quality that the formats above. Compresses data using a 128 kbit/s setting that results in a file about 1/11th of the size of the data.
- MIDI: Musical Instrument Digital Interface – commonly defined as a set of instructions instructing the computers sound card on creating music.Small in size and control notes of each instrument, loudness, scale, pitch etc.

Tracks, Files and Editing
- Cycling: Usually refers to musical cycles formed by a group of cycles.Useful for arrangements and re-arrangements
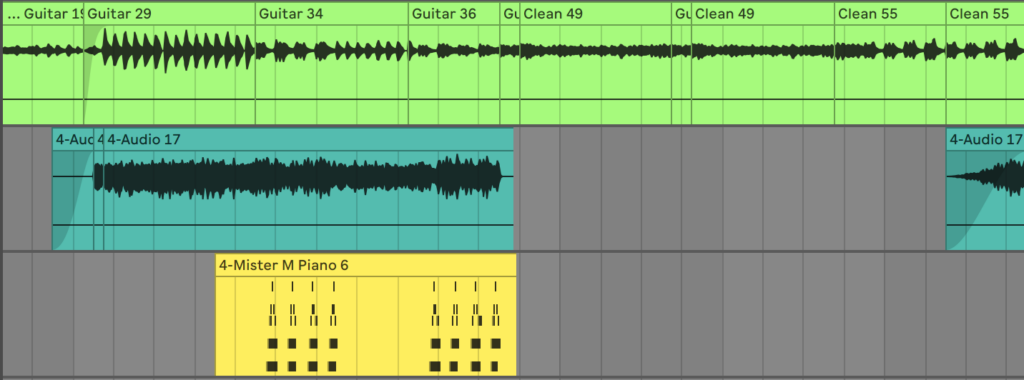
- Comping: Process where you use the best parts of multiple takes and piece them together for one take.DAWS such as ProTools allow multiple takes that are stocked in a folder in a single track.
- Destructive editing: Editing in which changes are permanently written to the audio file. Though these can usually be undone based on the DAW undo history in reverse order. Helps when you have less processing power and need to see changes applied immediately and in case where you know you don’t want to repeat that change again. Non-destructive editing uses computer processing power to make changes on the fly.
- Fades: Fades are progressive increases (fade-in) or decreases (fade-out) of audio signals. Most commonly used when no obvious ending of a song. Crossfades are transitional regions that can bridge regions so the ending of one fades into another.
MIDI
- Controllers: Hardware or software that generates and transmits MIDI data to MIDI-enabled devices, typically to trigger sounds and control parameters of an electronic music performance.
- Quantization: One of the more important concepts. Quantization has many meanings based on the task to be performed but in this context, it’s for making music with precision with respect to timing of notes. To compensate for human error on precision, quantization can help nail the right note at the mathematically perfect time. While great for MIDI note data, it does become challenging but a worthwhile effort to quantize MIDI tracks. Most DAWS have this built-in but this is not a magic wand to blow away all your problems. Quantization in my experience works best when Ive performed a track with acceptable level of timing.
- Velocity: Force with which a note is played and used to making MIDI sounds more human ( or more mechanical if thats the intent). This typically controls the volume of the note and can be used to control dynamics, filters, multiple samples and other functions.
Mixer
- Automation: Process where we can program the arrangements, level, EQ to change based on pre-determined pattern. For example automation to increase the reverb just before the chorus or add delays to a particular part in the mix.
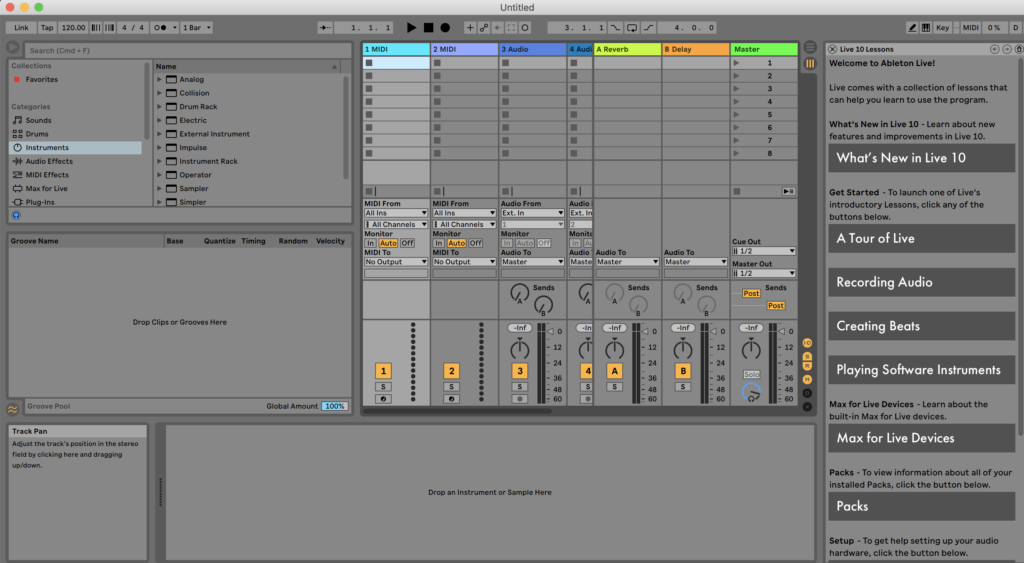
- Auxiliary sends: Type of output used in mixers while recording. Allows the producer to create an ‘auxiliary” mix where you can control each input channel on the mixer. This helps route multiple input channels to a single output send. A mixer can choose how much of a signal that needs to be sent to the aux channel. In Ableton, two Aux channels (Titled A and B) are created by default. Aux channels are great for filtering in effects such as reverb and delay.
- Channel strip – Type of preamp with additional signal processing units, similar to an entire channel in a mixing console (example).
- Bus: Related to Aux sends above, a bus is a point in the signal flow where multiple channels are routed into the same output. In Ableton, this is the Master channel – where all the tracks merge together before being exported.
- Unbalanced versus balanced: Used a lot with reference to cables.
- Unbalanced cables pick up noise ( from electrical, radio and power interference from nearby cables) and are best used for short distances, for example a short cable to connect different analog pedals with each other. Quarter inch TS (tip, sleeve) cables are used for unbalanced cables.
- Balanced cables: Have ground wire and carry two copies of the same signal that are reversed in polarities and they travel down the cable and cancel each other out. Once the two signals get to the other side of the cable, the polarity of the negative signal gets reversed so both signals are in sync. The noise as the signals travelled is picked up by both signals but not reversed in polarity effectively eliminating it.
Dynamic Effects
- Downward compressor: Same as a compressor which is reducing the level of louder things. When explicitly called out , “upward compressors” bring up the volume of the quiet material. One of the most important effects in audio engineering. Compressors are used for dynamic range and compresses the signal.Expander” Expander expands dynamic range. Louder parts become louder, quieter parts become quieter. Making it louder means amplifying the signal that passes the threshold, it is the opposite of a compressor.
- Gate: Provides a floor level for the signal to cross to get through – if the signal is below the gate level if will be treated as silence. Used to cut out the audio when it’s quiet.
- Limiter: Serves as a ceiling above which the signal cannot pass. It’s essentially a compressor with a very high ratio – as the compression increases, the ratio increases.
Filter and Delay Effects
- Convolution reverb: Convolution reverbs digitally simulate the reverberation of a physical or virtual space. They are based on mathematical convolution operations and use pre-recorded audio samples of the impulse response of the space being modeled. These use an Impulse Response (IR) to create reverbs. An impulse response is a representation of the signal change as it goes through a system. The advantage of a convolution reverb is its ability to accurately simulate reverb for natural sounding effects. The disadvantage is that it can be computationally expensive. Impulse response is the recording of a real space that we are applying with this mathematical procedure called convolution. In most Convolution plugins, we can find a wide variety of audio files that are representing a large number of real spaces. So, DAWS have large selections where we can simulate different places say a small club versus a stadium.
- Algorithmic reverb: Algorithmic reverbs are based on the settings we set in our DAW. These simulate the impulse responses. Algorithmic reverbs use delay lines, loops and filters to simulate the general effects of a reverb environment. All non-convolution reverbs can be considered as algorithmic. Algorithm reverbs are kind of like synthesizers since we are creating the impression of a space with an algorithm of some sort of a mathematical representation. These create echoes using mathematical algorithms to simulate the delays that occur in reverb. Tradeoff is that these may sound less natural than convolution reverbs.
- Comb filtering: Two audio signals that are playing the same signal arrive at the listeners ears at different times due to a delay. The signals look like a comb when graphed out.
- Dry/wet: Dry sounds that has no effects of any kinds of modifications. Raw unprocessed sound. Wet sounds are processed sounds with effects that are added while recording or after mixing.
- Low Shelf filter: Low shelf filters cut or boost signals of frequencies below a threshold. These usually use “cutoff frequencies” to cut /boost lower frequencies mostly to ensure instruments don’t interfere with each other. Used a lot during guitar EQ mixing and vocals.